
For those new to vinyl records, the most nerve-wracking moment is often not choosing a record or wiping the record player, but rather gently placing the stylus on the record.
Even the slightest wobbling can cause the stylus to slip, scratch the record surface, or even damage the cartridge. Mastering the correct stylus placement technique will make your vinyl record player run more smoothly and significantly extend the life of both the stylus and the record.

Why do you need to be gentle when releasing the pins using a vinyl record player?
Many vinyl record beginners ask, “Isn’t putting something down just putting it down? Why be so particular about it?”
There is only one reason: vinyl records are fragile, and the stylus is delicate.
The average width of the grooves on the surface of a record is only 0.03~0.05 mm.
The contact area of the stylus tip is extremely small, resulting in highly concentrated pressure.
Any excessive vibration, force, or angle will cause wear.
A single incorrect needle placement can cause irreparable scratches.
When I first started playing vinyl records, I also scratched the record with a “sizzle” sound because of my shaky hands when inserting the needle. Later, I studied the correct way to insert the needle and found that as long as you master the technique, a vinyl record player can be very durable.
Preparations that must be checked on the vinyl record player before inserting the needle
Before you begin inserting the needle, make sure you complete the following steps to avoid 90% of beginner mistakes:
1. Check that the tonearm is level.
If the tonearm is too high or too low, or the stylus enters the groove at an incorrect angle, it will cause:
Obvious wear
The sound is off.
Stylus switching jobs
Ensure the tonearm’s VTA (Vertical Tracking Angle) is adjusted correctly; generally, keeping the tonearm horizontal is sufficient. Most vinyl record players provide instructions on how to adjust them.
2. Confirm the anti-skate setting.
Anti-slip force keeps the stylus centered in the groove; improper settings will result in:
Stylus biased inward or outward
This leads to uneven wear.
Increased risk of scratches
Generally, it can be consistent with the tracking force, for example, tracking force 2 g, anti-slip setting 2.
3. Is the turntable spinning steadily?
Many beginners release the stylus before the turntable reaches a stable speed, which easily causes scratching. The correct procedure is
Turn on the turntable and let it stabilize at 33⅓ or 45 RPM.
Then insert the needle.
At this point, the stylus slides into the groove without being impacted.
4. Is the record clean?
Dust is the main cause of record scratches. Before inserting the needle:
Clean the surface of the record with a carbon fiber brush.
Check that the stylus tip is free of dust.
A clean record allows the vinyl record player to perform at its best while minimizing wear and tear.
How to correctly place the stylus on a vinyl record player? Detailed steps.
Step 1: Use the cue lever to lift the tonearm.
99% of vinyl record players are equipped with a cue lever, which allows the tonearm to descend slowly.
It is not recommended for beginners to manually add needles because:
Hands tend to shake
Difficult to control the force
Highly unstable
Records are easily bumped.
Cue Lever is the best helper for beginners.
Step 2: Move the tonearm to the edge of the record or the desired track position.
First track: The outer edge of the first circle of the record
Subsequent tracks: Move according to the track’s slot.
When moving the tonearm:
Don’t look down for too long.
Maintain stability of movement
Rapid movement can easily cause scratches.

Step 3: Hover the tonearm about 1 cm above the playback position.
Getting too close to the record will cause it to collide with the record. 1 cm is a safe height for stable control.
Step 4: Slowly push the cue lamp to allow the stylus to fall into the groove.
Do not touch the tonearm.
Do not move the record player.
Do not touch the record.
Don’t try to help.
You will hear a slight “pop” sound when you touch the record player; this is normal.
Step 5: Wait 1-2 seconds after the needle drops before adjusting the volume.
Avoid squeaking and distortion while protecting vinyl record player equipment and records.
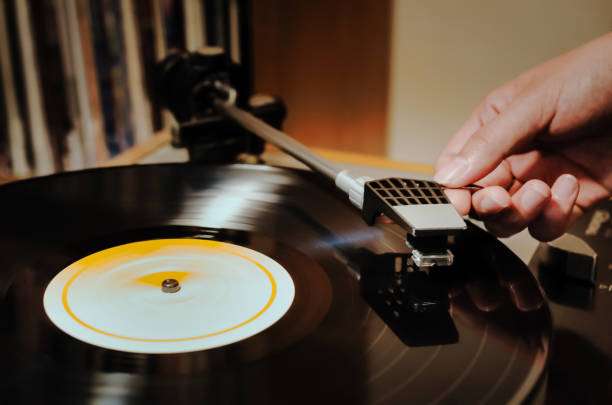
Manual needle release technique
If your vinyl record player doesn’t have a cue lever or you want to try more direct control:
Elbows supporting the table
Three-finger grip on the tonearm (thumb + index finger + auxiliary finger)
Wrist micro-adjustment height
Slowly approach the record
It stopped after descending 1 mm.
The touch of the record was as light as a feather.
Manual needle placement carries high risks but increases the sense of participation.
Precautions for avoiding scratching records when using a vinyl record player
Don’t swing the tonearm.
Do not adjust the angle when moving the tonearm.
The desktop must be stable to avoid vibration.
Do not move the record player the moment the needle drops.
Keep the table level to ensure even stylus pressure.
What if the record gets scratched?
Minor scratches:
Gently clean with record cleaning solution and a microfiber cloth.
If necessary, try using record restoration fluid to fill in the fine lines.
Deep scratches:
There is currently no 100% fix.
Advanced users can try using PVA white glue for repair (not recommended for beginners).
Summarize:
Putting down the stylus is a crucial part of the charm of vinyl records.
It makes music visible and tangible and allows people to regain focus and patience.
Simply follow the steps in this article:
Keep gentle and firm
Make good use of the cue lever.
Familiar with the position of the singing slot
Want a smoother stylus release experience? Choose an entry-level vinyl record player or upgrade to a high-quality stylus and tonearm system to make your vinyl journey smoother and every stylus release a high-quality enjoyment.

